How to Make a Welding Roll Out Wheel
Are you a welder and looking for a roll out wheel?
Oh, come on! You can make it on your own.
The available welding roll out wheels on the market are quite expensive. An 8-inch roll out wheel will cost you around $800 to $1,500, excluding the shipping cost.
You are a welder, so why not build your own roll out wheel and save money? It is possible to build a customized welding roll out wheel of your choice at a fraction of the price. It will cost you around $300, and you can even reduce that by using some scrap items. The best part is that you can make it according to your liking.
In this blog post, I will discuss how you can make your own welding roll out wheel. I will share the things required for the project and the step-by-step procedure along with some illustrations.
Let’s begin!
Things Required to Make a Welding Roll Out Wheel
We need a few important things to make a welding roll out wheel. You need to purchase them from any reliable website. I will also put a link to the products.
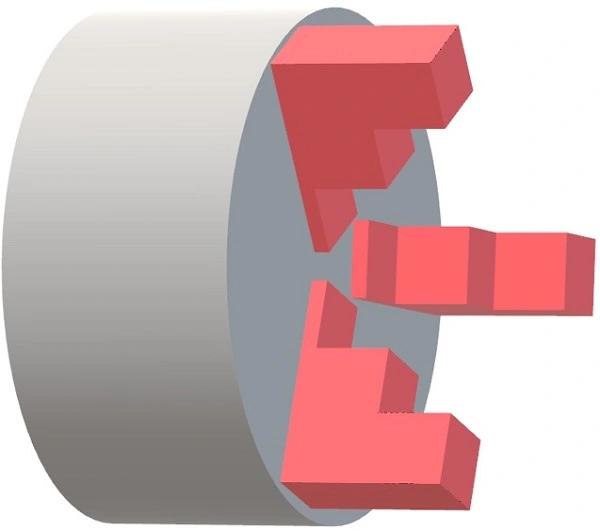
Lathe Chuck
The lathe chuck is the most important component of the welding roll out wheel. You can buy any suitable lathe chuck of your choice. However, an 8” lathe chuck is suitable for pipeline welders.
The 8-inch chuck will cost you around $100-$120.
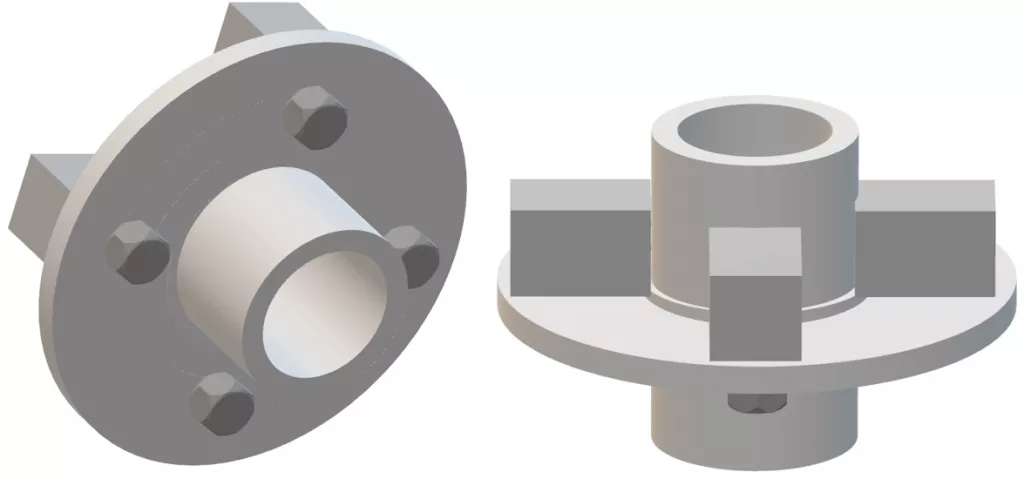
Axle Idler Hub with Spindle
The next important thing is the axle idler hub, which is used to rotate the lathe chuck. It will cost you around $40-50 along with the spindle.
Metal Tubing and Sheet
Metal tubing is needed to create the base of the roll out wheel. You need square tubing and make sure it is strong enough to hold the weight of the other parts. You need only around 5 ft tubing not more than that or according to your design alterations and the place where you want to fix the roll out wheel.
Secondly, you need a small piece of metal sheet to cut the handle and back plate of the chuck. You also need small pieces of steel sheet to mount the bolts and nuts for the angular adjustment and speed control.
If you want to connect the axle hub to a steel nipple, you can buy that. Otherwise, you can directly connect to the back plate of the chuck.
How to Make a Welding Roll Out Wheel?
Here are 10 simple steps to make a welding roll out wheel. But make sure to read them carefully before you start making the roll out wheel.
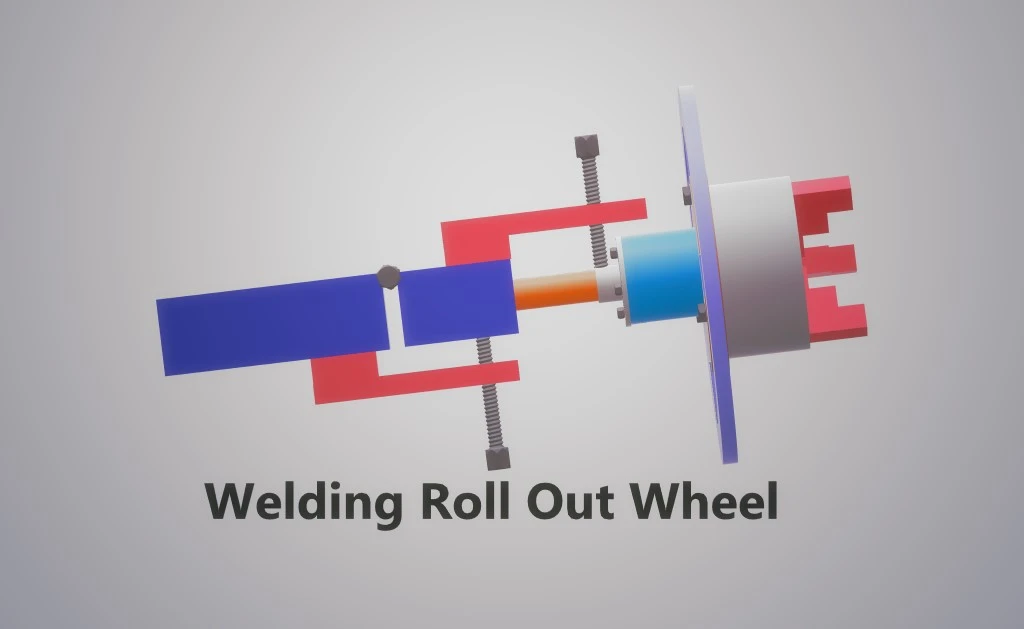
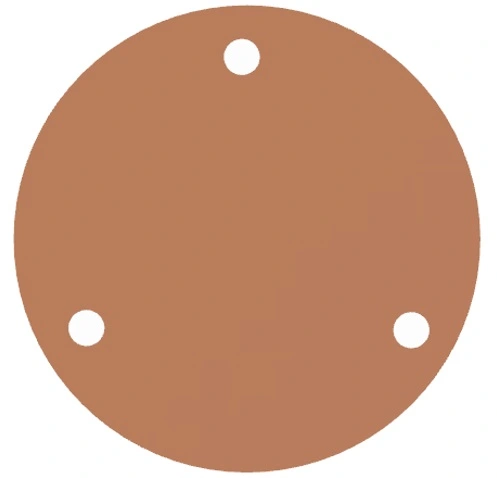
Step 1: First, you need to cut a circle from a metal sheet to fix the lathe chuck. Cut the circle using your gas torch, grill, grinder, or whatever you have. After that, drill holes according to the bolt threads on the chuck.
Step 2: Now, fix the chuck on the plate or circle with the help of bolts.
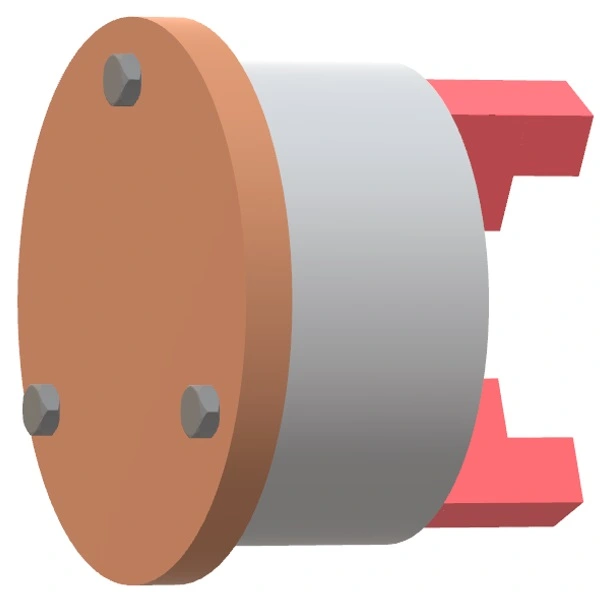
Step 3: It is time to fix the axle idler hub. You can either use a steel nipple to fix the axle or it can also be mounted directly on the metal plate. It depends on the hub you have.
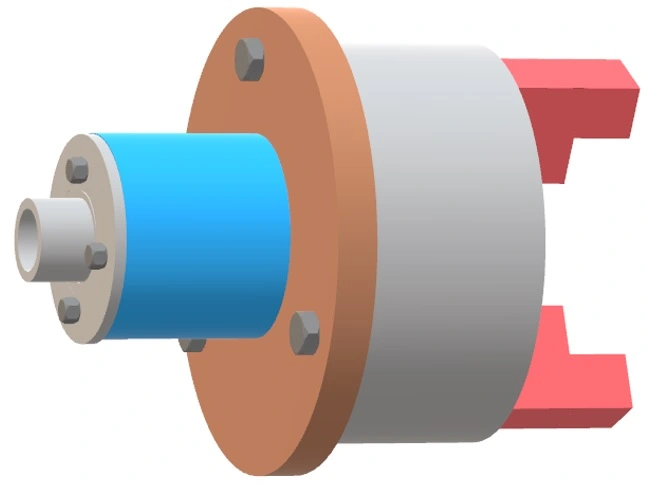
Step 4: Fix the spindle to the hub.
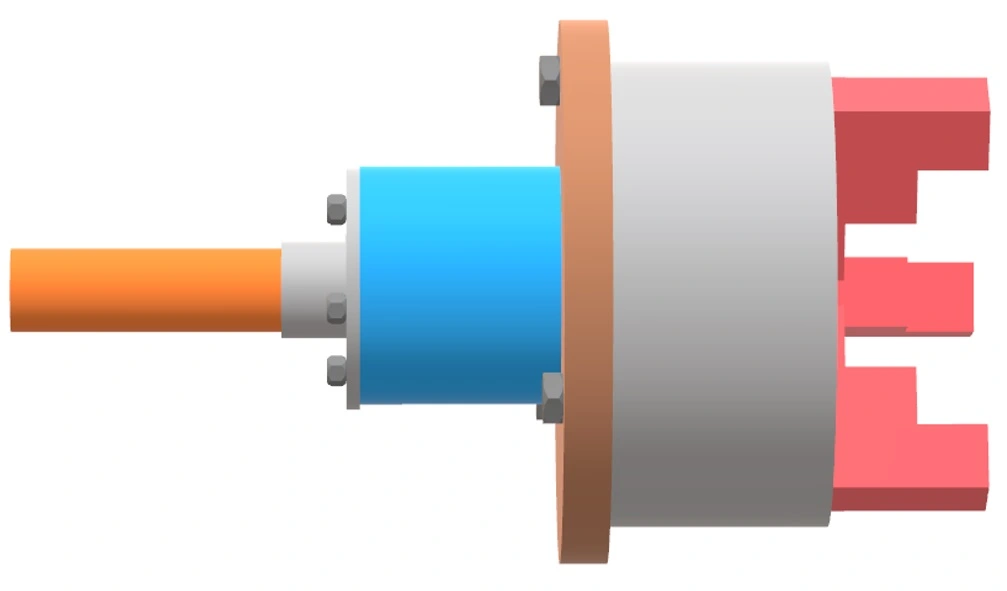
Step 5: It is time to add the wheel that can be used to turn the chuck. You can cut the wheel shape from a metal sheet. You can also bend a tube to create a circle. Do whatever seems suitable. Weld the wheel on the metal place you used to hold the chuck or on the steel nipple.
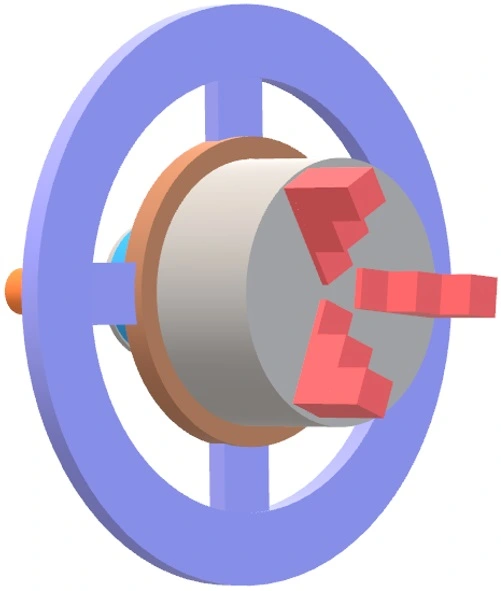
Step 6: The roll out wheel is almost ready. Use a small square tube around 4 inches long and weld the other end of the spindle.
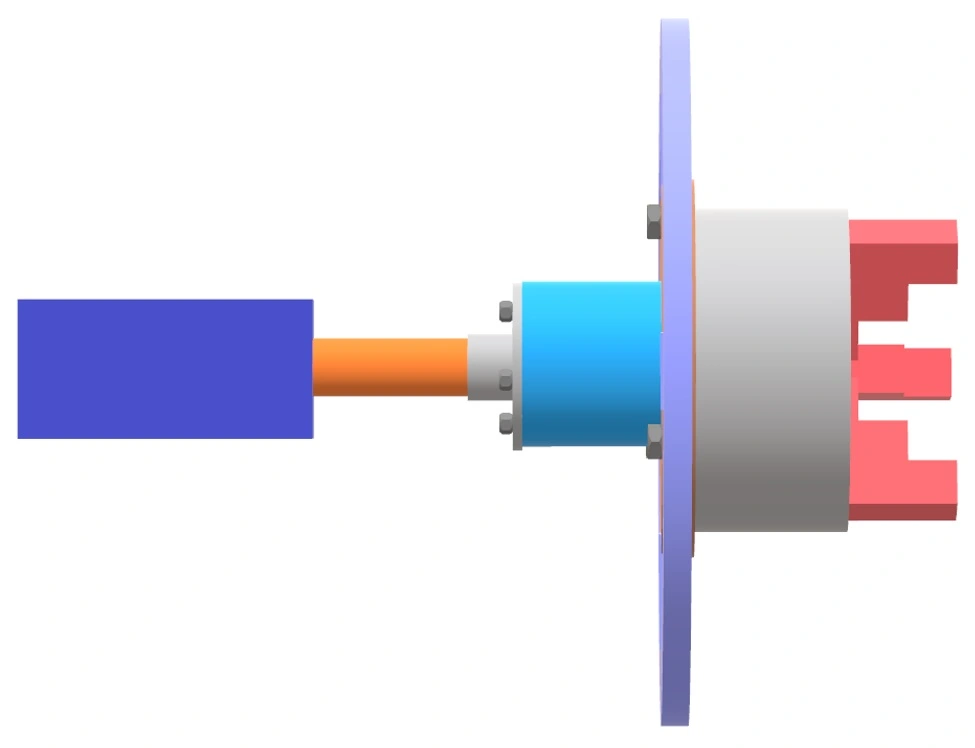
Step 7: We need a bolt to lock the welding roll out wheel when needed. For that, we will weld a piece on the square tube and weld a bolt to that. You can also add a piece of metal on top of the bolt to tighten and loosen without any hassle.
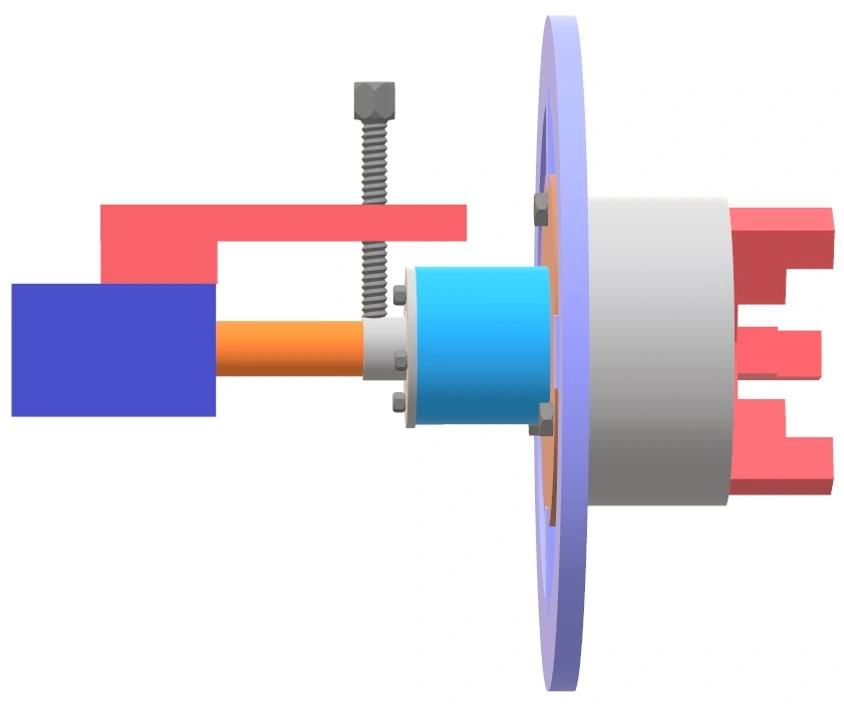
Step 8: Often, we also need to adjust the angle of the roll out wheel. First, we need to weld one side of a door hinge to the small square tube, which is attached to the spindle. The better alternative is to take a small piece of pipe. Cut it into three equal pieces, weld two of them to the square tube and leave the space of one in the middle. Check the figure below.
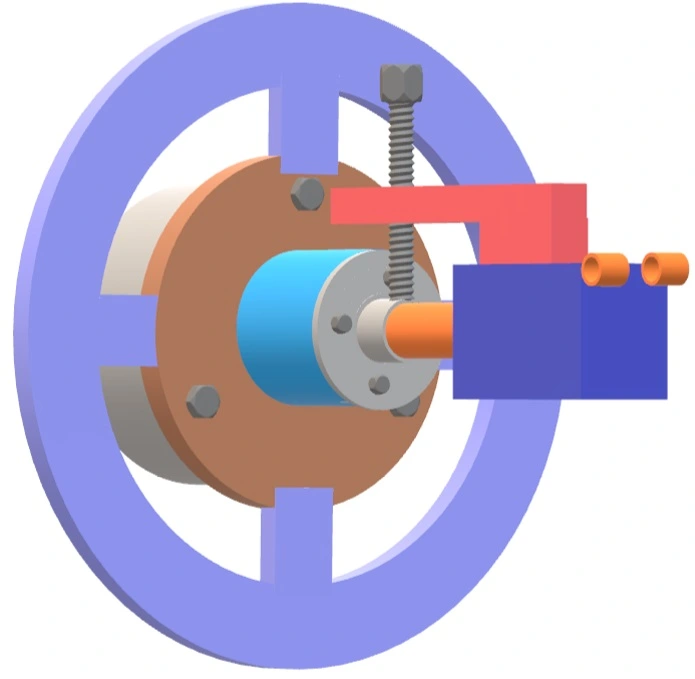
Step 9: Take a large piece of square tube. This is for mounting the roll out wheel on a tripod, welder bed, or wherever you want. Weld the remaining piece of the pipe on the square tube as shown in the image. Now, it will create a hinge, and we only need to insert a bolt through all three pipes.
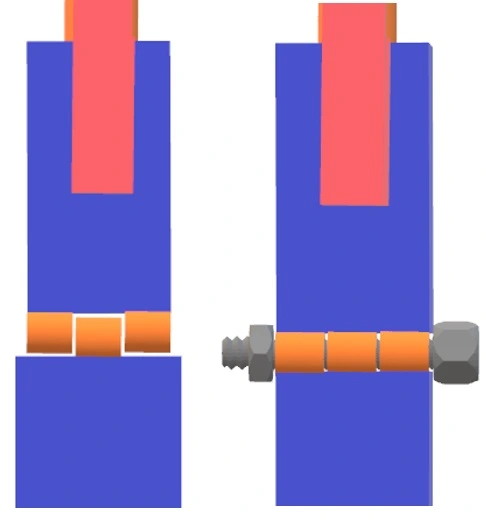
Step 10: Finally, we need to weld a small metal piece on the large square tube. It should be long enough to reach the small square tube. Insert a bolt in it to support the roll out wheel. The adjustment of this bolt will change the angle of the welding roll out wheel.
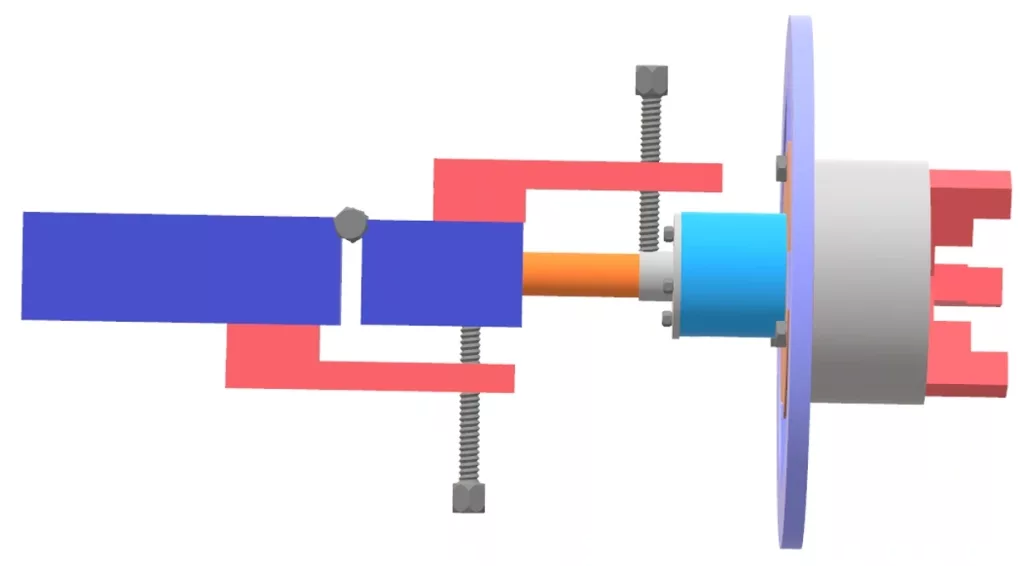
Congratulations! The roll out wheel is ready. You can now fix it to your welder bed or wherever you want.
Final Words
Making a welding roll out wheel is not that difficult. If you are a welder, you might have a clear idea after looking at the 3D models and the steps. So, save your money and make an excellent welding roll out wheel on your own. You can make changes according to your liking. It will cost you around $300.
If you like this guide, don’t forget to share it with your fellow welders.

